Alright, let’s talk about getting that gaming console connection smoother. I was getting seriously annoyed with connection drops and that dreaded ‘Strict NAT’ warning popping up in some games. Made joining friends a real pain. So, I figured, let’s try putting the console in the DMZ.
Finding the Console’s IP
First up, I needed to know the console’s address on my home network. Fired up the console, went into the network settings menu. It was buried a bit, under ‘Advanced Settings’ or something similar. Found the connection status screen, and there it was – the IP address. Something like 192.168.*. I actually went ahead and set a static IP address for the console right then and there. Just makes things easier so it doesn’t change later. Picked one outside the usual range my router hands out automatically, just to be safe. Jotted that number down.
Getting into the Router
Next step, gotta talk to the router. Opened up a web browser on my computer. Typed in the router’s address – usually it’s something like 192.168.1.1 or 192.168.0.1. If you don’t know yours, it’s often printed on the router itself. Got the login screen. Had to remember my admin username and password. Took me a minute, almost had to reset the darn thing, but I eventually got in.
Locating the DMZ Setting
Okay, inside the router’s brain. Every router menu looks different, which is always fun. I started clicking around. Looked under sections labeled ‘Firewall’, ‘Security’, ‘Advanced Settings’, ‘WAN Setup’. Sometimes it’s hidden pretty deep. Mine was under the Firewall settings, thankfully.
Setting Up the DMZ
Found the DMZ option. It was usually just a checkbox to enable it and a text box waiting for an IP address.
Here’s the crucial part:
- I ticked the box to enable the DMZ.
- Then, I carefully typed in that static IP address I set for my console earlier. Double-checked the numbers.
- Hit ‘Apply’ or ‘Save’. Gotta make sure those changes stick.
Testing and Checking
After saving, some routers need a reboot, some don’t. Mine suggested a reboot, so I did that just to be safe. Waited for everything to come back online. Went back to the console, ran its network connection test again. Success! The NAT type usually changes to ‘Open’ or ‘Type 1’. Fired up a couple of games that used to give me trouble. It definitely felt smoother, joining lobbies was quicker, and haven’t seen that strict NAT warning since.
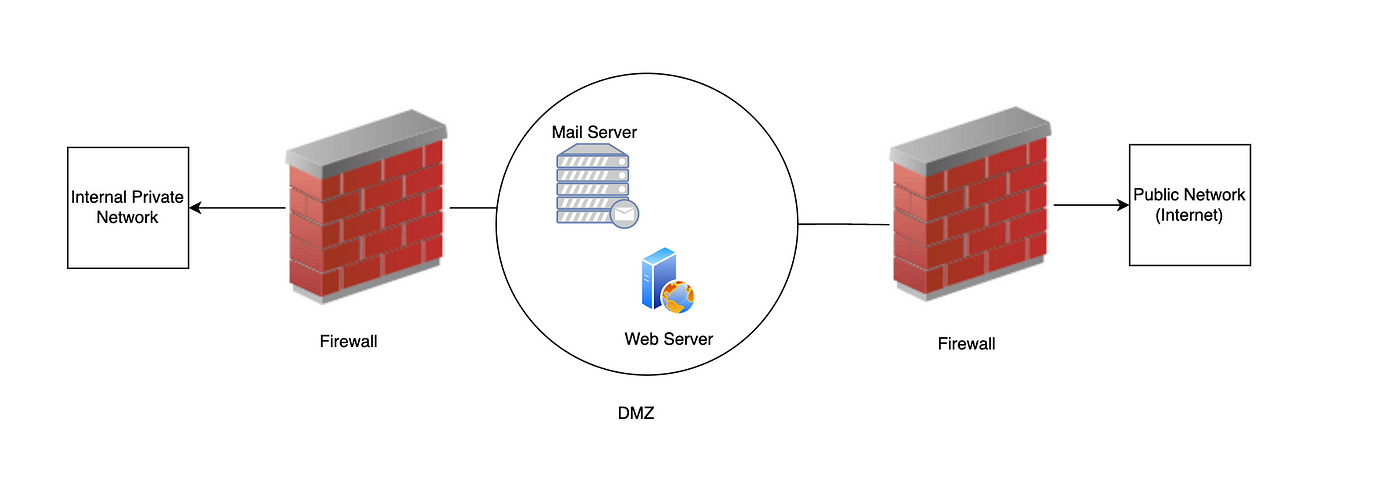
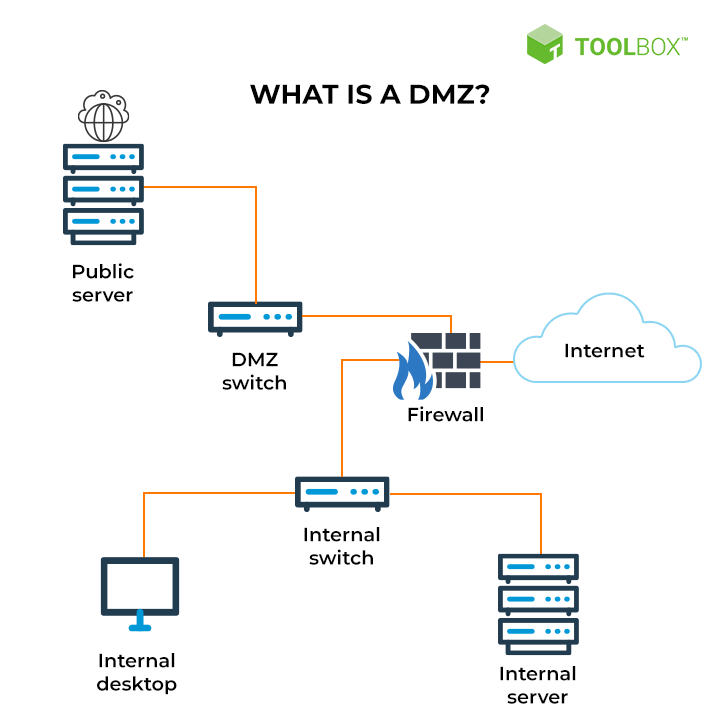
So yeah, that was my little adventure setting up the DMZ. It basically puts the console outside the router’s main firewall, letting all traffic through directly. Helps with NAT issues, but remember it means less protection for the console itself. For a gaming machine, I reckon it’s usually fine, but just something to keep in mind. Worked for me, though!