Alright, let me tell you about how I framed my Lakers jersey. It was a whole thing, but totally worth it in the end!

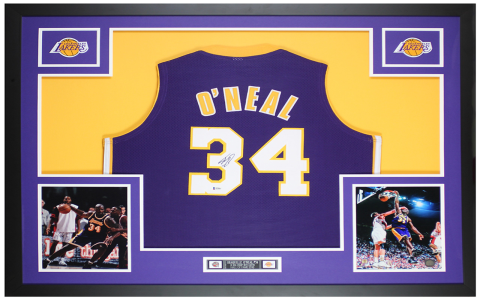
So, first things first, I actually had the jersey. It’s a vintage Kobe, which I snagged at a steal. But it was just sitting in my closet, getting all wrinkly and sad. I thought, “This deserves better! It needs to be on display!”
I started by doing some research online. I looked at a bunch of different framing options. There’s the super fancy archival stuff that costs a fortune, and then there’s the DIY route. I decided to go somewhere in the middle. I ain’t got that kinda money to burn, but I also didn’t want it to look like a total hack job.
Next up, measurements! This is crucial. I laid the jersey out flat on my dining room table (after clearing off all the junk, of course). I measured the width and length, adding a few inches on each side for breathing room. This gave me the size frame I needed to look for.
The big decision was where to buy the frame. I checked out some local craft stores like Michaels and Hobby Lobby. They had some decent options, but they were kinda pricey. Then I remembered that IKEA sometimes has good deals on frames. I took a gamble and drove over there. Bingo! I found a frame that was almost exactly the right size, and it was way cheaper than the craft store ones.
Okay, time to get crafty! This is where things got a little tricky. The jersey wasn’t perfectly flat, and I wanted it to look nice and taut in the frame. I ended up using some acid-free foam board as a backing. I cut it to fit the frame and then carefully pinned the jersey to the board, stretching it as I went.

Pro Tip: Use a ton of pins! You can always remove them later, but it’s better to have too many than not enough. Also, make sure the pins are acid-free. You don’t want them to damage the jersey over time.
Once the jersey was pinned, I carefully placed the foam board into the frame. It was a tight fit, but that’s what I wanted. I secured the back of the frame and then hung it up on my wall. Boom! Instant Lakers shrine.
The whole process took me a couple of hours, but I’m really happy with how it turned out. It looks way more professional than I thought it would, and it was a fraction of the cost of getting it professionally framed.
Here’s a quick rundown of the materials I used:
- Lakers Jersey (duh!)
- Frame (from IKEA)
- Acid-free foam board
- Acid-free pins
- Measuring tape
- Scissors
If you’re thinking about framing a jersey yourself, I say go for it! It’s a fun project, and you’ll end up with a cool piece of memorabilia to show off. Just take your time, be careful, and don’t be afraid to experiment.

And that’s the story of how I framed my Lakers jersey. I hope this helps someone out there!


